Friday, September 28, 2012

Adventures with Davy

I feel like I have a puppy!! I left Davy home alone in the house since she didn't seem to like it...I came home to this!!


Thats my carpet next to the glass door. I guess she thought she could tunnel out under the door. 

So, I had to leave again to go to my Stepmom book study and put her in the mudroom thinking, there's no carpet she can destroy in here...came home to this...


My husband is fabulous and says "at least putting in a doggy door will be easier now". He's so glass-half-full. I love it!

We rigged up some rope outside for when we leave. She seems to do okay outside alone. We'll just have to see what happens. I'm off to Petsmart to get her a name tag and a doggie bed! 

xoxo,
Sara


Wednesday, September 26, 2012

A Gift from God: The story of how we got Davy

We had to put our little 18 year old chihuahua down about 2 months ago because he was just so old it hurt everyone to look at him. When he started having seizures, we knew it was time. We missed him a lot and who he represented: my husband's father who passed in November of 2010.

We had been looking at other dogs and couldn't really find one that fit our family. Some where too big and too boisterous which is not a bad thing but with little Mae it was not a good fit. 

Joe randomly sent me a picture of this sweet lab mix that a coworker of his had rescued and he asked if we could keep her.

We decided to take the baby over there and meet her to see how they got along. The couple that had her only had other dogs, not babies. Before we went, I prayed for a sign that this was the dog that needed to be in our family. We always decided that we wanted to rescue instead of buying because too many animals need saving. I prayed exactly for the dog to walk right up to Madeleine when we got there.

So when we arrived, I went in and set Madeleine on the floor so the dog could come up to her and you know what....she did just that. I was sold. She is so sweet and mild mannered and just the right size for our family to have an indoor dog that wont squash our baby.

When we got home however, the first thing she did was climb the fence and run away. We looked for about two hours before having to give up. Joe prayed that she would come back to us even though we thought it was a long shot since she'd only been at our house for about 10 minutes before running away. We were sad. 

Then about two hours later, a knock on our door comes from our neighbor who points to our beautiful dog who found her way back to our house and was waiting in our driveway. Truly led back to us by Jesus who know has told us this is our dog and we are to love her and take care of her. 


We brought her inside and gave her some water and a much needed bath and now she's happily sleeping on our floor. We're so happy that we have our pretty dog back! We've decided to name her Davy meaning "beloved". 

xoxo,
Sara

Tuesday, September 25, 2012

Deciding to Homeschool


We have decided to homeschool!

I'm just scared about the influence other children will have on my daughter. So, we've decided to homeschool so we can keep our family values the most prevalent in her life. I also want her to LOVE learning. I want her to have hands on, customized learning. So, even though she's only 16 months, I'm going to start my research and preparing now that way in a few short years, I'm not blindsided by it's arrival.

I found a website called Mr. Printables that lists "oodles of free printables". I got that super cute printable to frame and put in our reading nook (which yes, we already have and she uses ALL the time).

So, thank you to Mr. Printables and Lakeshore Learning for putting some much needed motivation into our decision to homeschool.

How many of you homeschool? Why and how's it going?

xoxo,
Sara

Wednesday, September 19, 2012

Mud room make over

So Lookie what my husband did for me!!! He took the doors off of the mudroom closet. Because really, it's just become a giant junk drawer. I'm pretty sure that's an old DVD player that doesn't work anymore yet we still have it stashed away in there.

I'm on a mission to turn it into a room that's actually functional. Starting tomorrow, I'm going to add a bench seat in that closet after I remove all the shelves and try to find some way to hide that hideous pipe. :-/ any suggestions would be greatly appreciated.

I am also going to repaint the whole room and perhaps extend the coca cola thing. Not sure because husband is not exactly excited for something like that.

My mom is a wine manager for heb so she gave us all those bottles for a project...honest!!!

Xoxo,
Sara

Tuesday, September 18, 2012

Sicky Baby = longer naptimes

So, I've been at home with a sicky baby. I'm not sure what's wrong with her other than she's just got a bug. However, because she's been ill, I've managed to squeeze some crafting time out of her longer than normal naps! I was asked to make some invitations by a lady for her 5 year old daughters costume party. I was only told that she was five, loved girly stuff, and glitter. So I made these!


Please excuse the random A on the outer portion of the invite, it was a failed attempt at calligraphy!

While she liked them, she's thinking now it's going to be a science party where the kids get to do science projects so, I'm off to make her daughter into a cartooned paper science kid! Here it goes! 

xoxo,
Sara

Friday, September 14, 2012

Alcohol Ink Coasters

I had been seeing Alcohol Ink Coasters spinning around the internet and since I do love me some Ranger Alcohol Inks I decided to try it.


The main tool you'll need is the Inkssentials Ink Blending Tool and either a piece of white felt cut to size or there are packs of white felts that are made specifically for this tool and the alcohol inks. I went ahead and got the pack because it's easier.


You'll need alcohol inks of course! I got the Farmers Market kit because I thought it was Christmassy...is that a word?


Stick on a white felt to the velcro on your blending tool and add drops of inks in whatever color/arrangement you want to. 

Here's how I decided to do mine. Mine is the maroon on top and the purple on the bottom. 


Choose your base. I have these glossy white tiles that I wanted to play with (as you can see in my background I tried it before I took pictures to post)


Start pressing the felt down onto the tile in various positions turning the tool this way or that. Or leave it one direction and have a pattern. 

Like this. 


At the end you'll have this. Beautiful "tie-dye" "Stained-Glass" art!

Experiment with different techniques till you find the one you like best. Try painting on rubbing alcohol (just the normal drug store kind) and dropping the ink directly onto the tile. It will pool and puddle and mix together to make some really interesting designs. 


Seal your tiles with a polyurethane before you use them so nothing runs or chips. 

Have fun!!!

 xoxo,
Sara


Saturday, September 8, 2012

Thinking About Halloween


I have been asked to have a Halloween Party by my oldest bonus daughter... I'm thinking these may be the invitations!

We are considering having a murder mystery party where people receive their roles in the mail with their invites and they learn their character and through out the night, the play "plays" out and at the end of the party, the murderer is revealed in a Clue type fashion to see if the guests could figure out whodunnit before the night is over. 

I'll be the host so I may end up being the Victim so the guests can play it out without anyone having to die early...that's not so much fun.n

Have any of you tried it?

xoxo,
Sara


Thursday, September 6, 2012

This post is brought to you by the letter A

My daughter is very bright. I'm talking HUGE vocabulary bright. I do not want to hold her back so I'm teaching her things they are way beyond a 15 month olds typical learning.

So, while watching Sesame Street my husband asked me if I started teaching her letters. Well, I haven't because she is only 15 months. But...I don't know why I haven't. She already can recognize the word HOT and the word PEPPER by things around the house so why not start her on her letters if she's ready to learn them.

So, I'm inviting you to join us to learn a letter a week. Now, this is not "standardized test" learning where she'll be tested on it and required to remember verbatim. That's not fun and she's only 15 months hahaha

So, this week we'll start with---go on guess which one we'll start with----okay I'll tell you---

A

In honor of the letter A, my handy dandy Silhouette Cameo and the lovely design of Snapdragon Snippets, I made a 3D letter A Box!

and now, for pictures

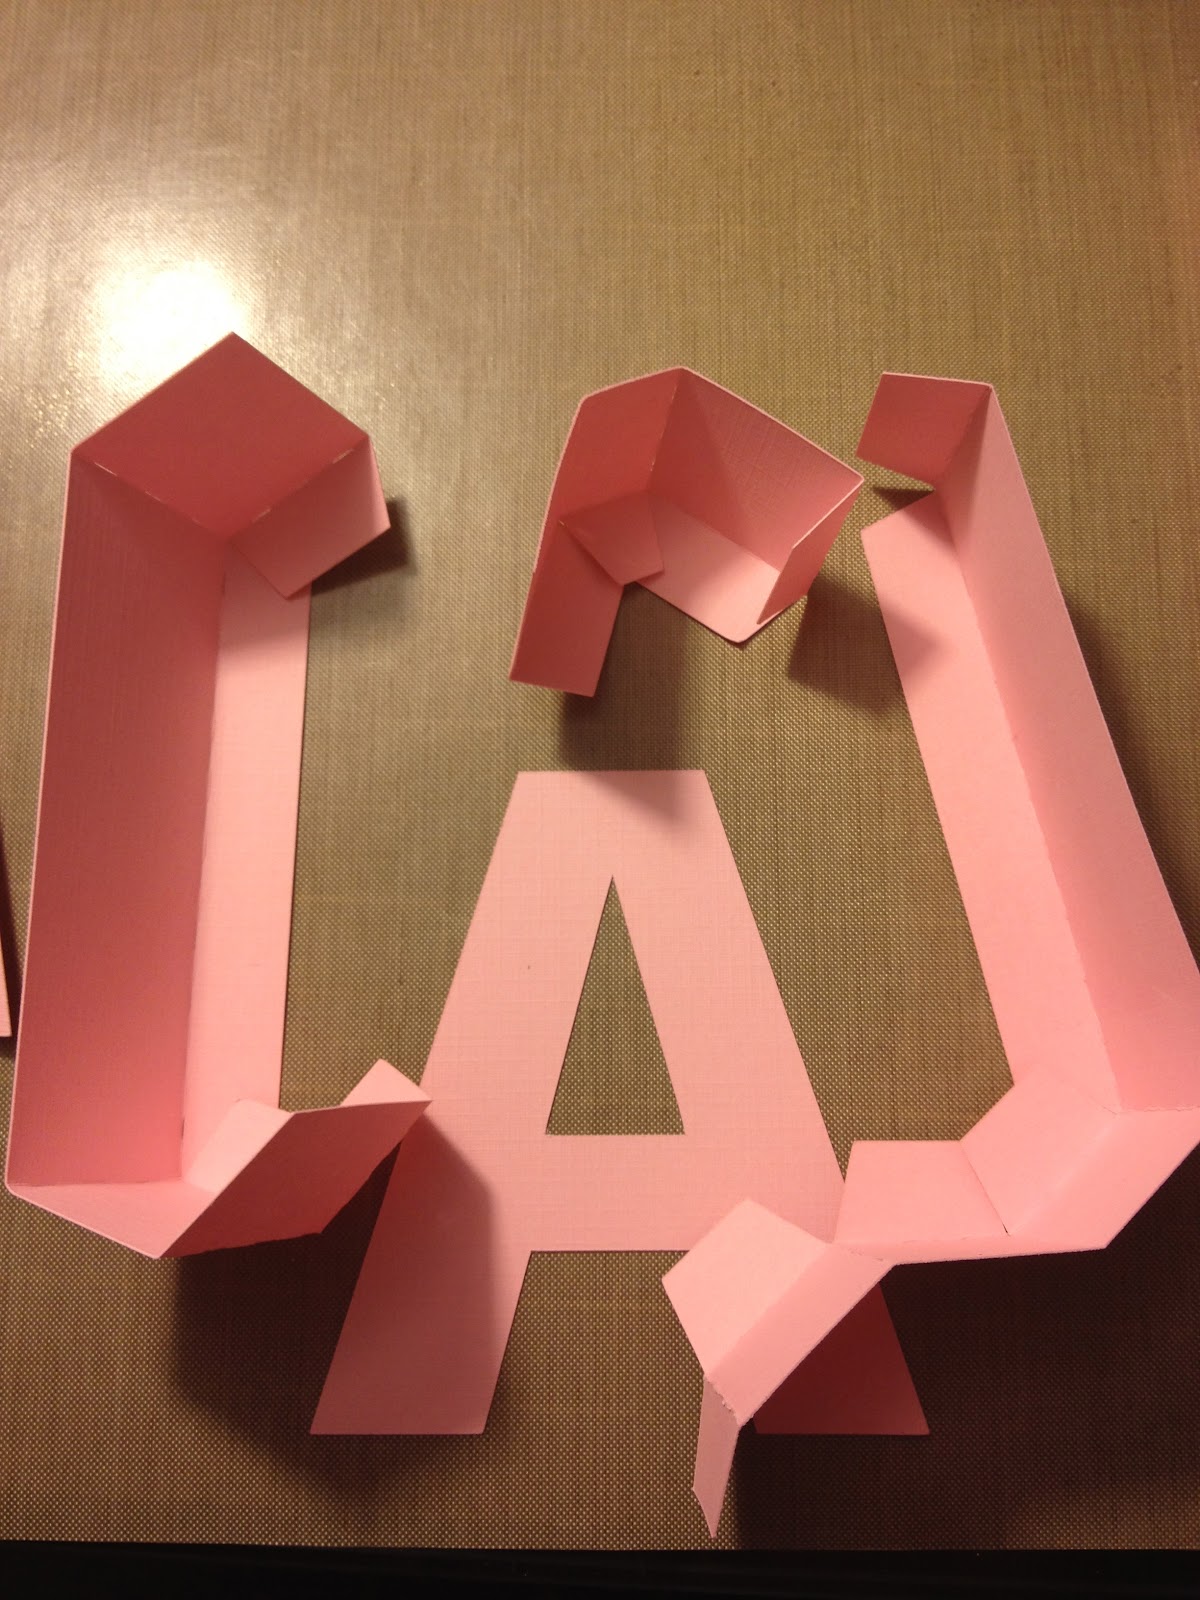
Cut all your pieces out and lay them out so you can work on it easily. 


 We're doing the base of the box first. fold it all in and arrange to be glued down. (it took me a second to realize how it was going to bend to fit onto the letter. 

I placed my double sided tape down first and then laid the tabbies down on top of it making sure to align the edge of the bent parts with the edge of the A. 

Do the other side the same way. Tape first, adhere second.  

the middle of the A was confusing. Especially because I had two letters and I couldn't tell which was which. Once they're folded and glued, they will fit the appropriate A perfectly so just pay attention to size. 

Here it is in the middle of the A.  

 Here is the top and the bottom.

 taa-daa!

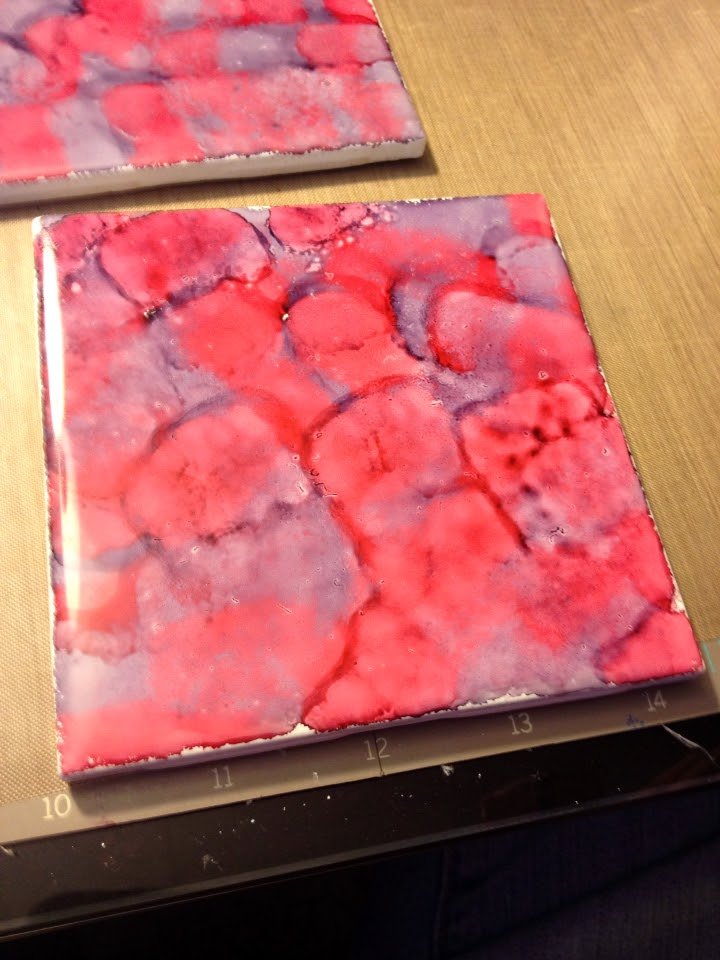
Then, upon closer inspection, learn that the skinny straight strips are, in fact, accent pieces.

 Recut in fun matching print. :-) **HINT: DO THIS FIRST- don't waste paper like me**

The fatter strips go on the base and the thin ones to the top. I placed them together so I didn't further mess it up.  The long bits go on the sides and the squares are actually different sizes so here's another area where you need to pay attention. On the base: there is a larger square that goes on the top of the A. The others are all the same size and go on the outside at the bottom of the in the "curvy" part.  
 Like this...
Here's the base of the A.  


Here is the top of the box. This one also has different size little squares. The largest square goes on the tippy top like the base but there are even different size squares for the bottom of it. 
The two next largest go on the legs of the A and the smaller ones go on the inside.
...I guess it would be the thighs of the A?

Enjoy your new 3D A Box designed by Snapdragon Snippets


xoxo,
Sara


Wednesday, September 5, 2012

tINKer Time! Distressing and Shimmering! Class: September 26th 6-8pm

If you don't know who Tim Holtz is...shame on you! He's the leading "steampunk" go to person for paper crafting. He distresses everything! Right now, I'm offering a class for you to learn all the totally cool techniques he does! 

The next class is September 26th from 6-8pm and if you come during open house (September 8th from 11-3) you can get HALF OFF the class! If you come learn these techniques, it will open the door to learn the "Vintage Christmas Card Tricks" class beginning in October!


See ya on Saturday!

xoxo,
Sara


Tuesday, September 4, 2012

First Day of Pre-School

Granted, it's only mothers day out on Tuesday's and Thursday's but since we will homeschool that's really the only school she'll have. So we are gonna count it! She is nearly 15 months (on the 11th) and quite the handful.

Xoxo,
Sara

Cricut Card Tricks: A Quilted Christmas----OPEN HOUSE SPECIAL!!


Here is the card I made with the Cricut Quilted Christmas cartridge. It's a sample for the classes that start in October so I can't tell you how I made it. But it was super fun!
It'll be on October 17th from 6-8pm and the 18th from 10am-12pm. Sign up September 8th between 11-3 during OPEN HOUSE for HALF OFF Paper-Ed classes! That's a seriously good deal! It's the same 2 hour class but for half the price. Seriously... come and sign up. :-) See you then!!

xoxo,
Sara

Monday, September 3, 2012

NEW PRODUCT!! Stamping Gear from Inkadinkado

Okay, so I try to stay hip to the trends...despite the fact I still use the word "hip" I'm pretty good at it! This is one of the trends that's hitting stores now! Stamping Gear from Inkadinkado. 


It's a nifty stamping tool that allows you to make neato designs like those little things where you put your pen in and it makes swirly stuff! It's like that only easier! 

 I chose a white cardstock for this example and "Broken China" Distress Ink from Ranger. (It's my favorite color) Chose your cling stamp and set it on the Stamp Paddle Block, Ink, and set in notch. Ink, set it next notch, ink, set in next notch. Easy peasy!
You come out with this beauty!!!
Taa-daa!!


These stamps are super versatile and you can do lots of unique ideas with them. There is a special Stamping Gear demo at Michaels at the Rim in San Antonio on September 22nd from 1-2pm hosted by yours truly. Come on out to see how it works for yourself!!

Have fun!

xoxo,
Sara


ps: I wasn't paid for this post. I just did it because I loved the product and wanted to brag about it.